
If you’re like me, a good chunk of your journey through Naughty Dog’s vision of a ravaged Seattle was spent with time frozen. Heightening emotions etched on faces in story beats, fists balled and bodies stretched taut come fight scenes, gazing at the quiet beauty of a city partially reclaimed by nature. All opportunities to pause and activate Photo mode. Compositions framed, settings played with and – finally – the click: a moment in time memorialised into your PS4 Capture Gallery.
Post-campaign, The Last of Us Part II’s Chapter Select allows you an easy way back to your favourite haunts and sequences, to find new moments worth capturing or achieve a more polished pass of a shot you weren’t quite happy with the first time round. Maybe you’re looking for tips to improve your skills or challenge yourself with more creative approaches. And who better to give guidance on perfecting your in-game photography than the creator of The Last of Us Part II? Naughty Dog has kindly found time between judging the best community photos via its own Photo Mode contest* to offer up top tips for those who want to sharpen their photographic eye on a return road trip through the Pacific Northwest**.
Spoiler Alert: Warning: the following article contains heavy story spoilers for The Last of Us Part II
John SweeneyReleArt Director, Naughty Dogase Date
“When using our Photo Mode, I tend to stick to some basic numbers when dealing with things like Depth of Field (DOF) and Motion Blur. Keeping those in tandem around 10%, and then adjusting the intensity of the DOF and various Filters simultaneously will get some really nice results as a base.”


“Keeping the Noir filter at 10-20% can add a nice filmic contrast to the image, especially for our overcast levels in Seattle. From there, I’ll then mess with Saturation and Exposure to fine tune. In most cases, pushing Saturation or Exposure to the extreme in tandem with the filter modes will create some really striking results.”
“I think once you get those basic settings in, it all comes down to experimentation. You’ll notice that most of the filters in the game are fairly monochromatic, but the intention was to give you the full range from 1 to 100 so you can find what works best for you.”


“Compositionally, I stay conscious of the thirds grid we’ve given as an overlay to help me compose cinematic looking shots. As you can probably tell from the shots I’ve taken, I’m a big fan of the black cinema bars to help this aesthetic, as well. Finding areas in the environment that have controlled lighting (like a light shaft coming in through a window) will be a big contributor to what kind of sculpting and compositional shapes you’ll get. Lastly, be sure to check out the Slow Motion options in the Accessibility settings menu. Having the game at half speed will help you nail those perfect moments of an explosion or an action pose for more dynamic shots and moments from the game.”


Keith PacielloEmotional Systemic Facial Animator, Naughty Dog

“Portrait: Under Filters, I played with Filter and Intensity to adjust the color. Then adjusted the Depth of Field (DOF) to blur out the background slightly, as well as added Vignette to help focus the eye on Ellie. I also used the 1.33 Ratio under Frames for a stronger composition.”

“Portrait – 1 Pose, 3 Different Approaches: I started with a Portrait Shot (Top Left Image). Then played with different Camera Angles, DOF, Framing, Filters and Vignette settings (Top Right and Bottom Images), making sure to take pics along the way, so I can go back and compare to see which one(s) I liked best.”

“Cinematic Shot: I started with finding a strong pose and an appealing camera angle, then I played with DOF to really blow out the background, which helped put the focus on Ellie (Distance was 5 and Intensity was 60). Next, under Display, I brightened the image overall to about 60, as Ellie was a bit silhouetted due to the light source being behind her. I also adjusted Sharpness (Under Display) and Film Grain (Under Screen Effects) to make Ellie feel a bit more in focus. After that, I played with Frames and found that the 2.75 Ratio added a bit more dynamic and cinematic feel to the shot overall.”
“Cinematic Shot: I found a camera angle and framing (2.75 Ratio) that I felt was intriguing, then I adjusted the DOF and Vignette settings to help direct the viewer’s eye a bit more.”
Ashleigh DaleQA and Dev Support, Naughty Dog

“Let the lighting do the work. All those gorgeous god-rays and moody lighting the lighting artists put in gives you a really great place to start from. In this shot, I pulled the camera out as far as I could go and tried to focus on silhouetting Ellie against the flare light. Then, I wanted to see what kinds of interesting shapes would be left if I knocked out more light by turning on the black and white filter.”

“This shot lineup is pretty similar to the one I used the black and white filter on. For this one I was focused on how I could get more painterly looks by using the filters and then knocking them back a bit from full strength. This filter is Blue Orange set to around 85%.”

“For this shot I wanted to play with camera roll in order to achieve a dutch angle and make the shot feel much more dynamic than the standard camera angle. I also used the Trinity filter here and knocked pretty far back to add some vibrancy to the trees and help play up the cold light coming through the trees from the overcast sky.”

“For this shot, I relied heavily on the grid overlay to align the camera into an interesting composition, according to the rule of thirds. I also used a filter here (either Blue Orange or Vintage, if I remember correctly) knocked back to around 75%. I also really like to use the Depth of Field settings to make the point of interest a bit sharper than everything else. It’s hard to necessarily see what it’s doing unless you really crank the strength all the way up and then change the depth to decide where you want it, then pull the strength back down to a level that looks good. I also did this in the shot of Hillcrest.”

“I was also really focused on the lighting in this shot, as well as playing with the big S-curve that the Brontosaurus skeleton has. I put the camera low to the floor to emphasize the scale of the skeleton and used the grid overlay as a guide again for the composition. I put on the same filter I used for the museum shot with Ellie and pushed the Depth of Field to focus on the skeleton’s head. Using the Depth of Field setting this way also helps to push a painterly quality within the shot when using a filter.”
Matt NeapolitanCinematographer, Naughty Dog
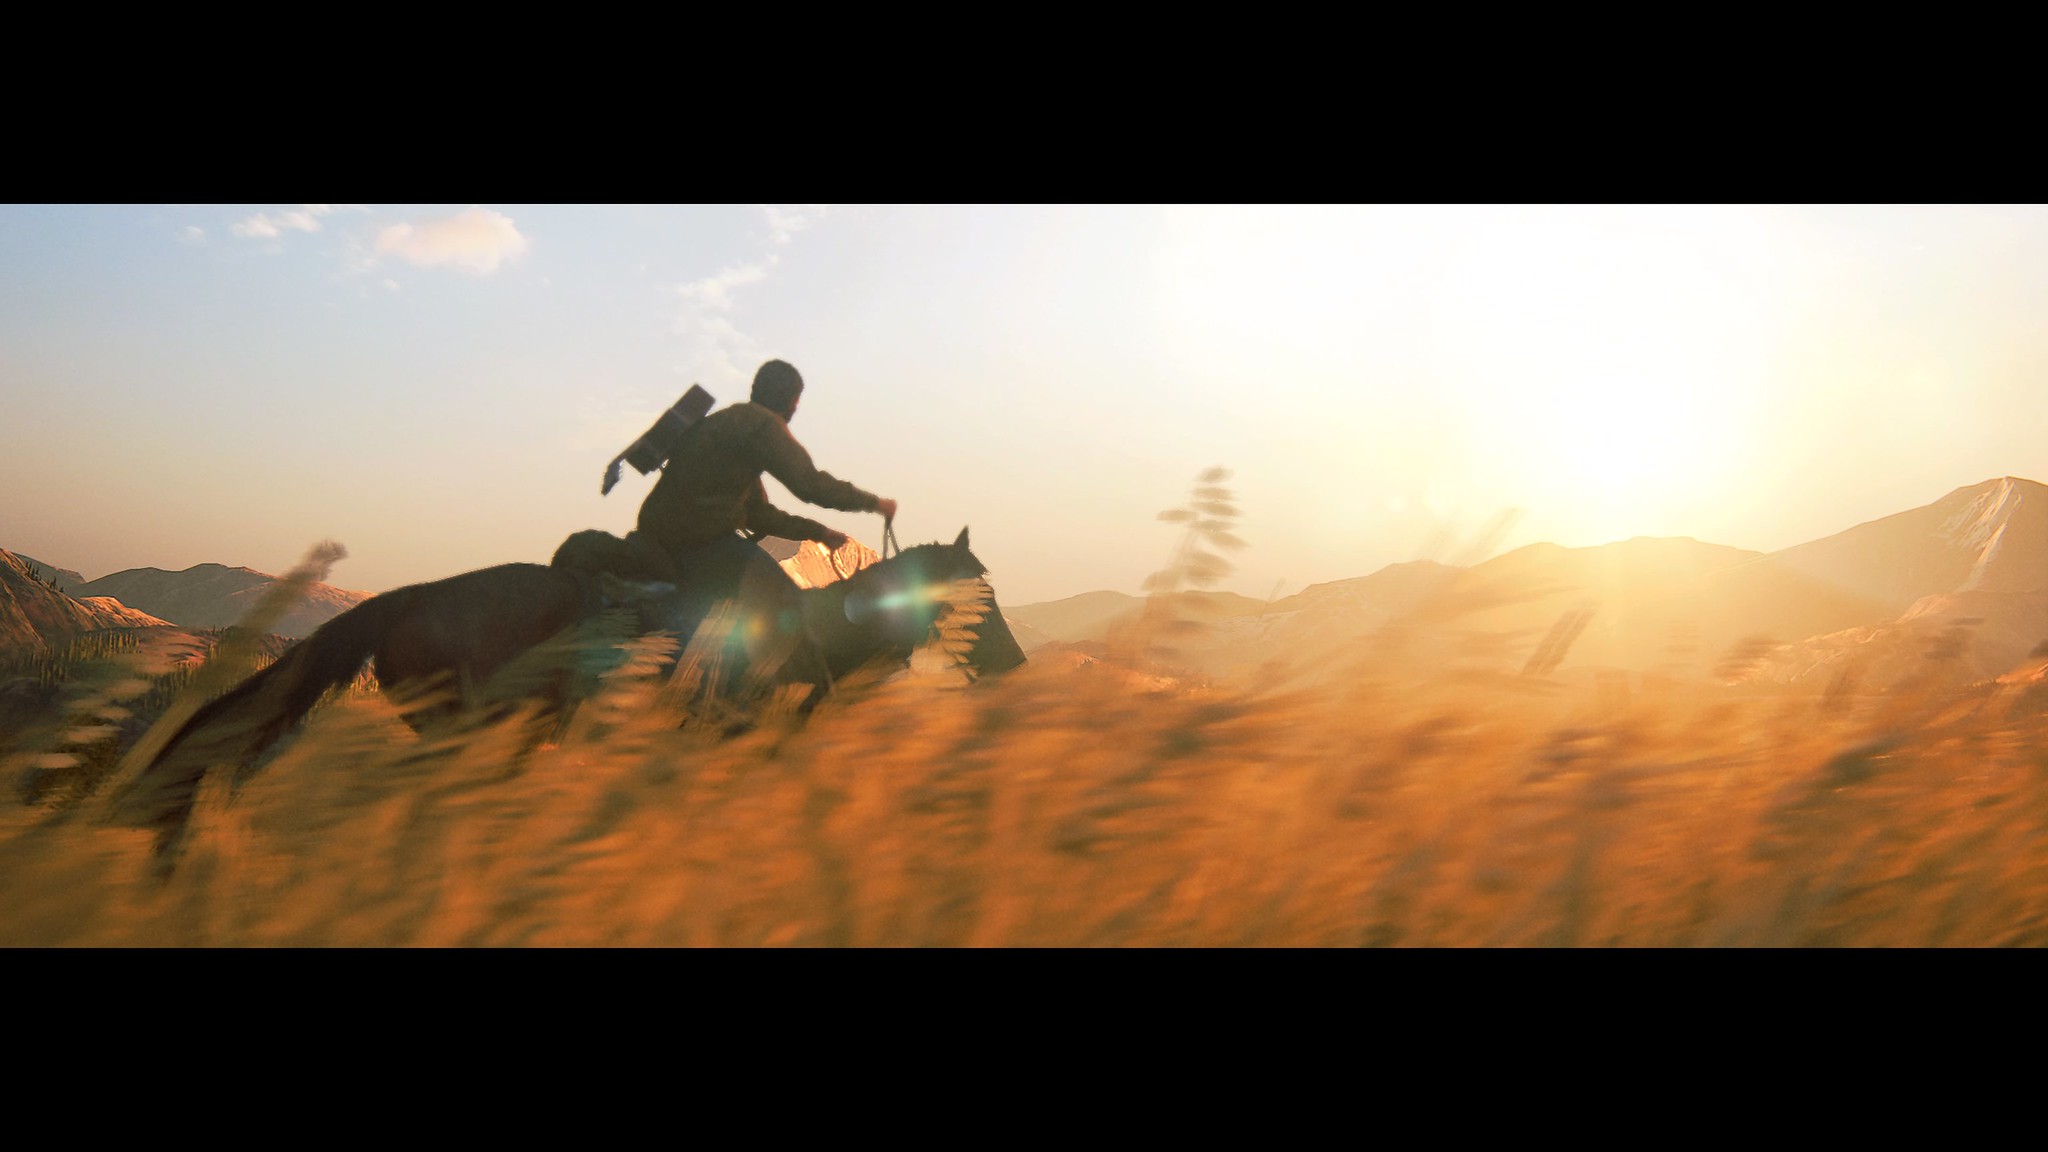
“I wanted to add a sense of motion in this still image. With the camera moving at a fast clip, an open shutter would smear the image sensor with the reflected light over time, resulting in the blur seen in the foreground here. So, I turned Motion Blur up to emulate the longer shutter speed and added a vibrant filter to exaggerate the colorful palette of the sky.”
“You generally want to leave open space in front of moving subjects, so I’ve framed the shot to “place” the horse screen left with nothing but negative space to the right for balance.”
“While the principles of art and design, like placement and balance, are important to understand, you don’t want to feel constrained by them. There are no hard and fast rules of what makes a good image. It depends on the subject, the timing, the artist, and the context. What in the field of view is most important? What’s the point of the shot? What moment in time am I choosing to expose the film to light?”
“One of the pillars of design for The Last of Us Part II was adherence to physical properties of the real world. This is a gritty, nearly photoreal depiction of life in a relatively bleak future. Accordingly, our cinematography tries to obey the behavior of real world lensing and light. Photo Mode approximates the effects of key factors like aperture size, shutter speed, and ISO with parameters like Field of View (FOV), Depth of Field (DOF), and image adjustments like Brightness, Saturation, and a variety of filters.”
“One behavior of real lenses is that generally the closer you are to the subject or the higher the focal length, the stronger the depth of field effect. A longer focal length (a smaller FOV in Photo Mode) usually results in a shallow depth of field. So, to add realism, when you use a smaller FOV, increase the intensity of Depth of Field correspondingly to get your subject sharp in focus with a soft, blurred background.”
“It’s golden hour here, so we have a warm glow on the scene, and Ellie is backlit so we see her only in silhouette, just enough to convey a sense of her inner mind at this point of time. These are some of the things we consider when choosing light angle, hue, and intensity.”

“Photography and Cinematography involve so many disciplines – painting, lighting, color theory, drawing, perspective – it’s often useful to limit the number of factors you’re trying to keep in mind and focus more purely on the lines and forms. Set the Saturation to 0 or use the “Noir” filter to explore a more abstract, less literal attempt at capturing the 3D scene in two dimensions. I’ll often compose shots in black and white, focusing on the shapes and poses in silhouette, knowing that if the composition doesn’t work in grayscale, all the beauty lighting and rendering in the world won’t make it work in color. This is a low light image, so I’ve turned the Grain setting up to 90 to emulate the film grain or noise that results from the higher ISO settings necessary in low light conditions. The lack of color, extra grain, and extreme aspect ratio give this image a classic horror film look.”

“I love the crop feature. You shouldn’t necessarily shoot images with the knowledge you’ll crop it later, you should usually try to get the best shot in the moment. But the ability to crop and try different aspect ratios can really change how the image feels. Here we have a vertical subject, the waterfall, so I wanted a less horizontal aspect ratio. The diagonal lens flares of the sun break up the verticality of the waterfall and trees nicely. Several choices makes this a somewhat surreal image – an unnaturally narrow aspect ratio, chromatic aberration, a large FOV that distorts the vertical lines a bit, and a fast shutter speed (Motion Blur = 0) that freezes the motion.”

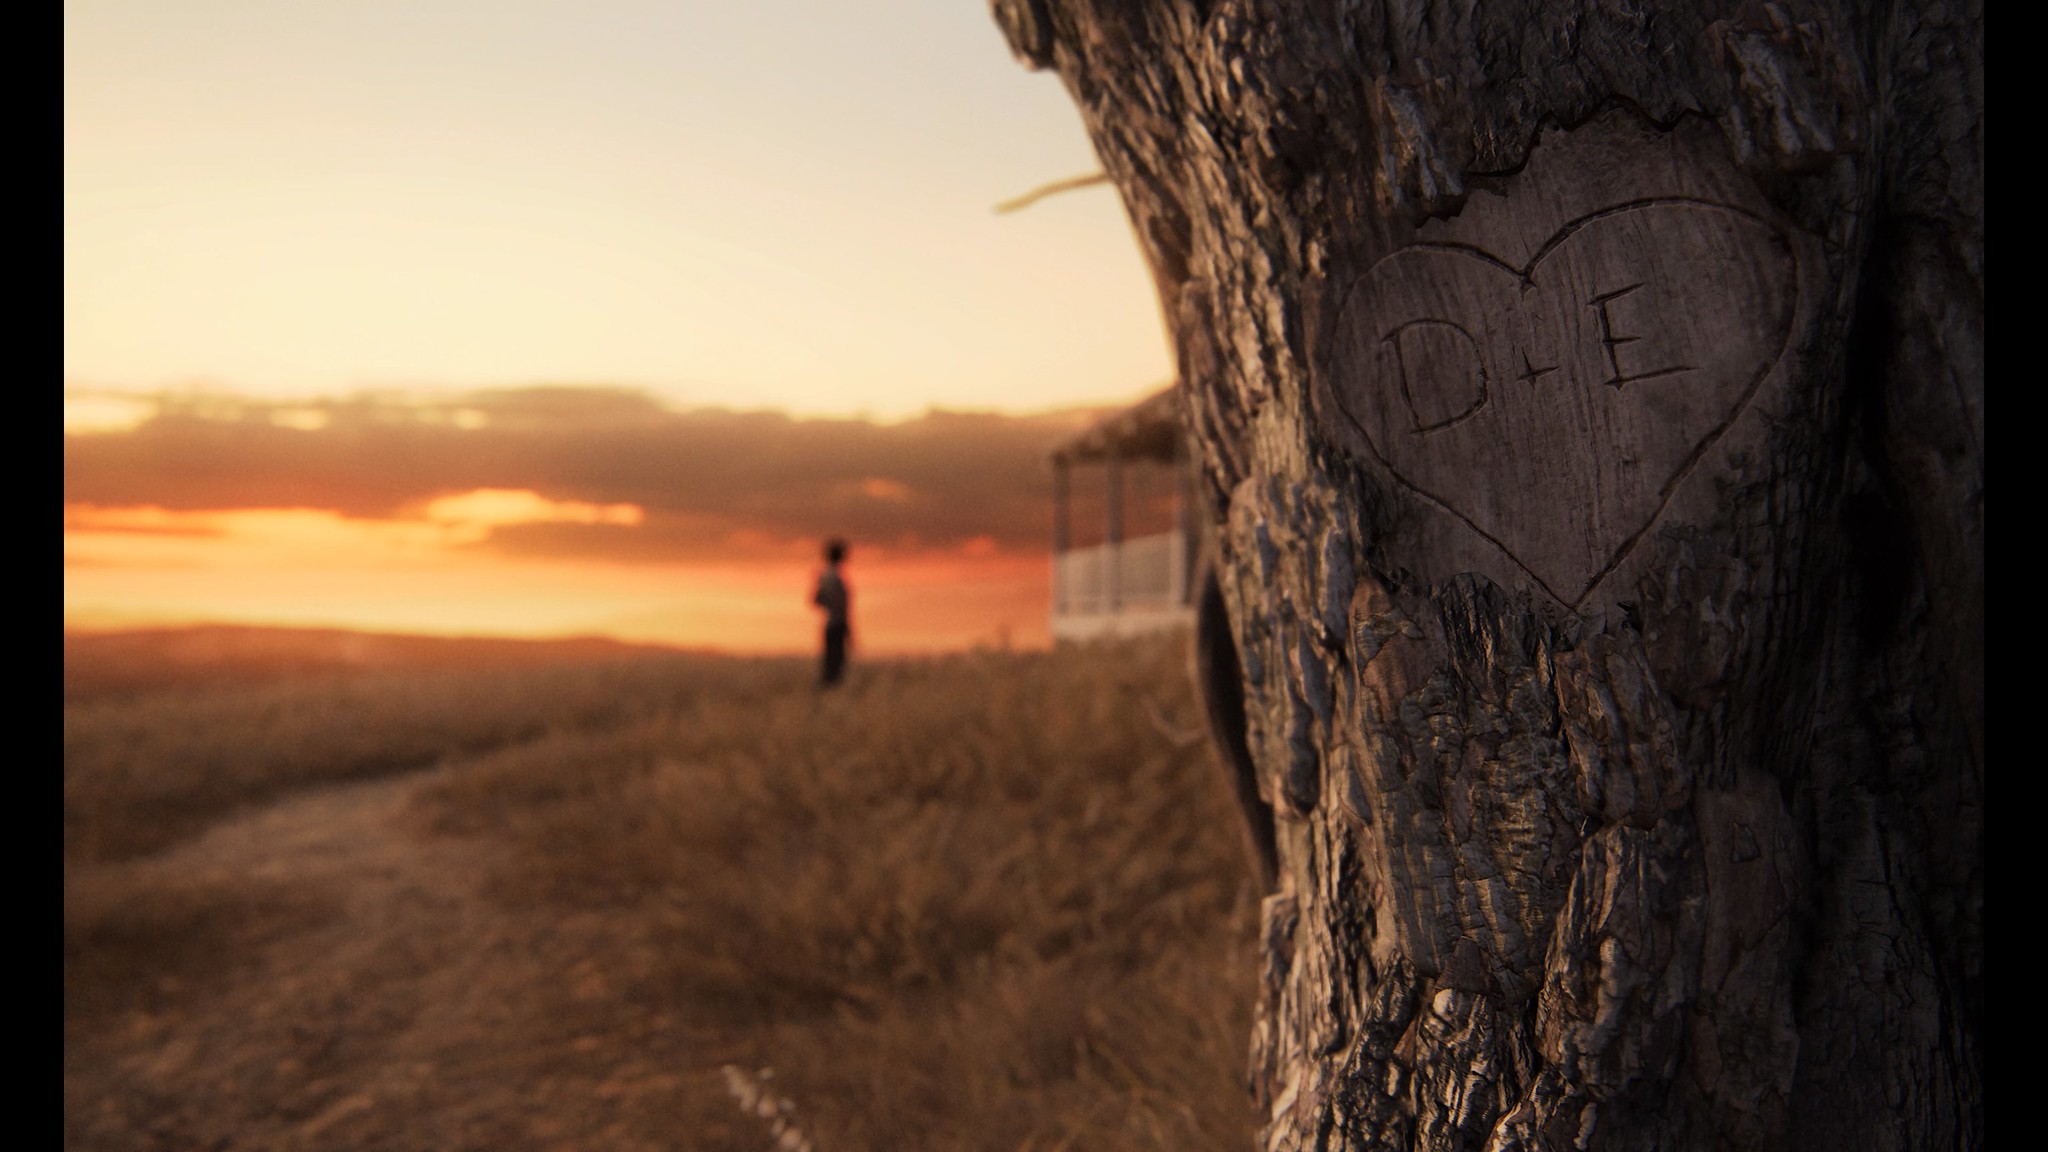
“I call this kind of shot a “storytelling” shot, where I use a large FOV and a wide aspect ratio to show as much information as possible. Accordingly, I’ve reduced the Depth of Field to nearly zero as large FOVs generally have deep focus, allowing you to see everything in crisp focus from the foreground branches to the cabin in the distance. I used the concept of Fibonacci divisions to divide the frame with overall balance in mind and then some added Brightness and Saturation to increase the contrast of the orange glow from the cabin with the cold blue of the exterior. Everything from the dynamic diagonals of the foreground branches to the footprints in the snow to a slight vignetting at the corners points to the subject of the frame, the cabin.”
Drew WilsonQA and Dev Support, Naughty Dog

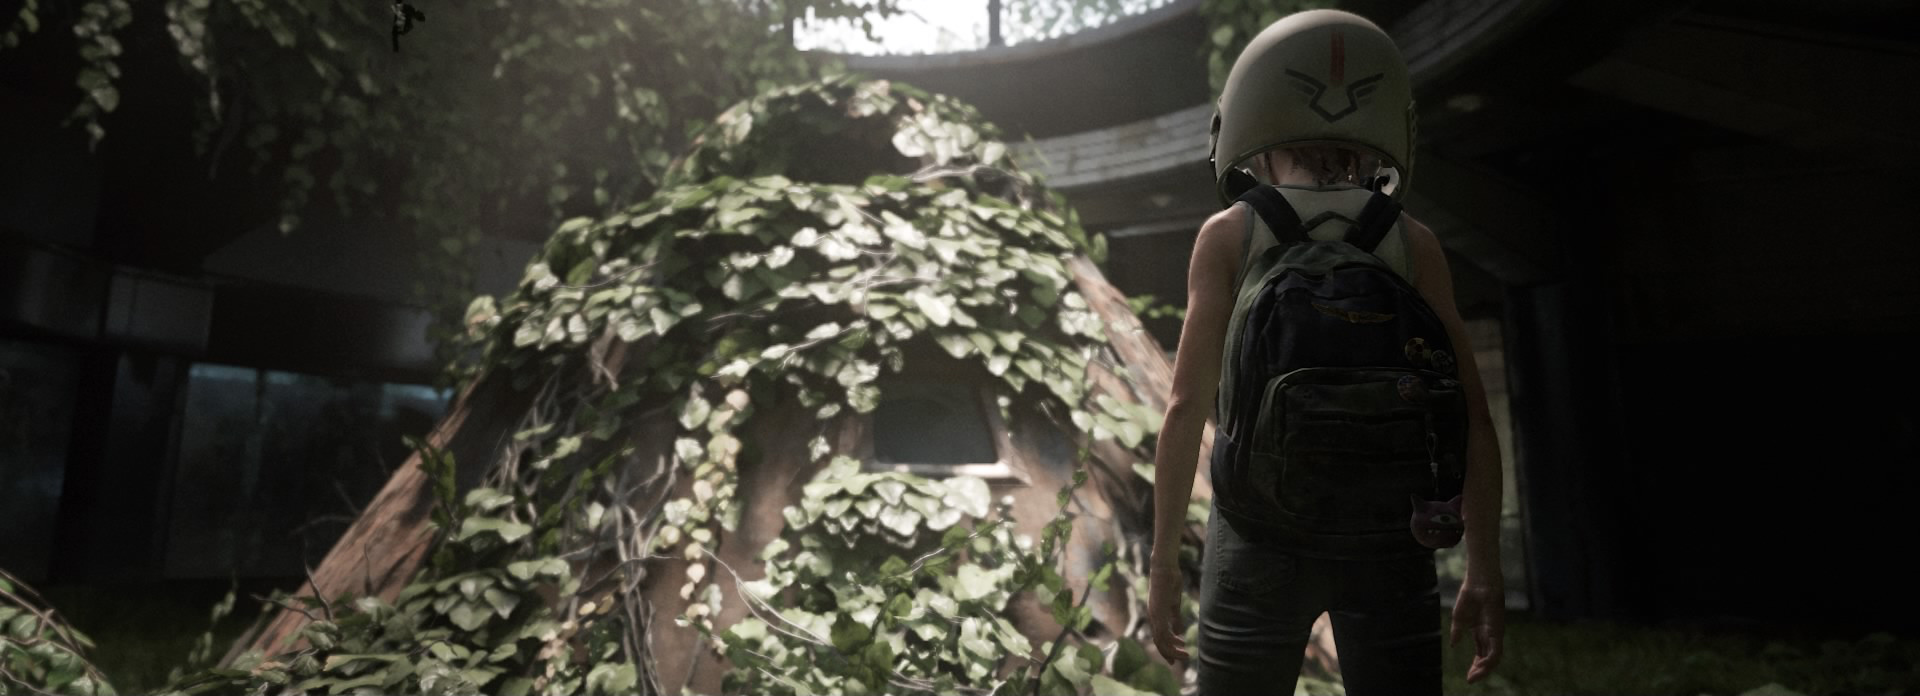
“This was the first Photo Mode picture I took, as this was a level I worked on. I knew people would really connect to this iconic moment in the game. To have Joel stand there, the player must interact with the capsule and then pick up a helmet, in that order. The lighting here is really great and the small tweaks included adding a Depth of Field to smooth out the background, upping the Saturation, and turning down Film Grain. In fact, those three tweaks are my go-to’s for the type of images I like to capture.”

“This is another one I took early on. I wanted to capture the awe of the first time players see the big T-Rex reveal here. I also wanted to make sure Joel was in the shadows, quietly watching. My tweaks included adding Saturation and sharpening the image. I also use R3 to pull up the grid often to align the characters. One of the first things I did here was pan all the way out with R2 just to see how far back the camera can go and adjust from there. I added a 2.75 ratio frame for a cinematic look.”

“Another area for great lighting here and I wanted to showcase that. I turned up the Film Grain and added a higher Chromatic Aberration for a distorted effect. It was also important to light Ellie’s face here.”

“To capture this one, I was looking for an open area with contrasting colors where I could zoom far out and have a nice landscape piece. Here we have the green from the forest, the blue/grey from the buildings and street and also the orange from the fire. I wanted to draw the eye to Ellie, so much of the background is blurry with Depth of Field turned on and Film Grain is at around 40.”

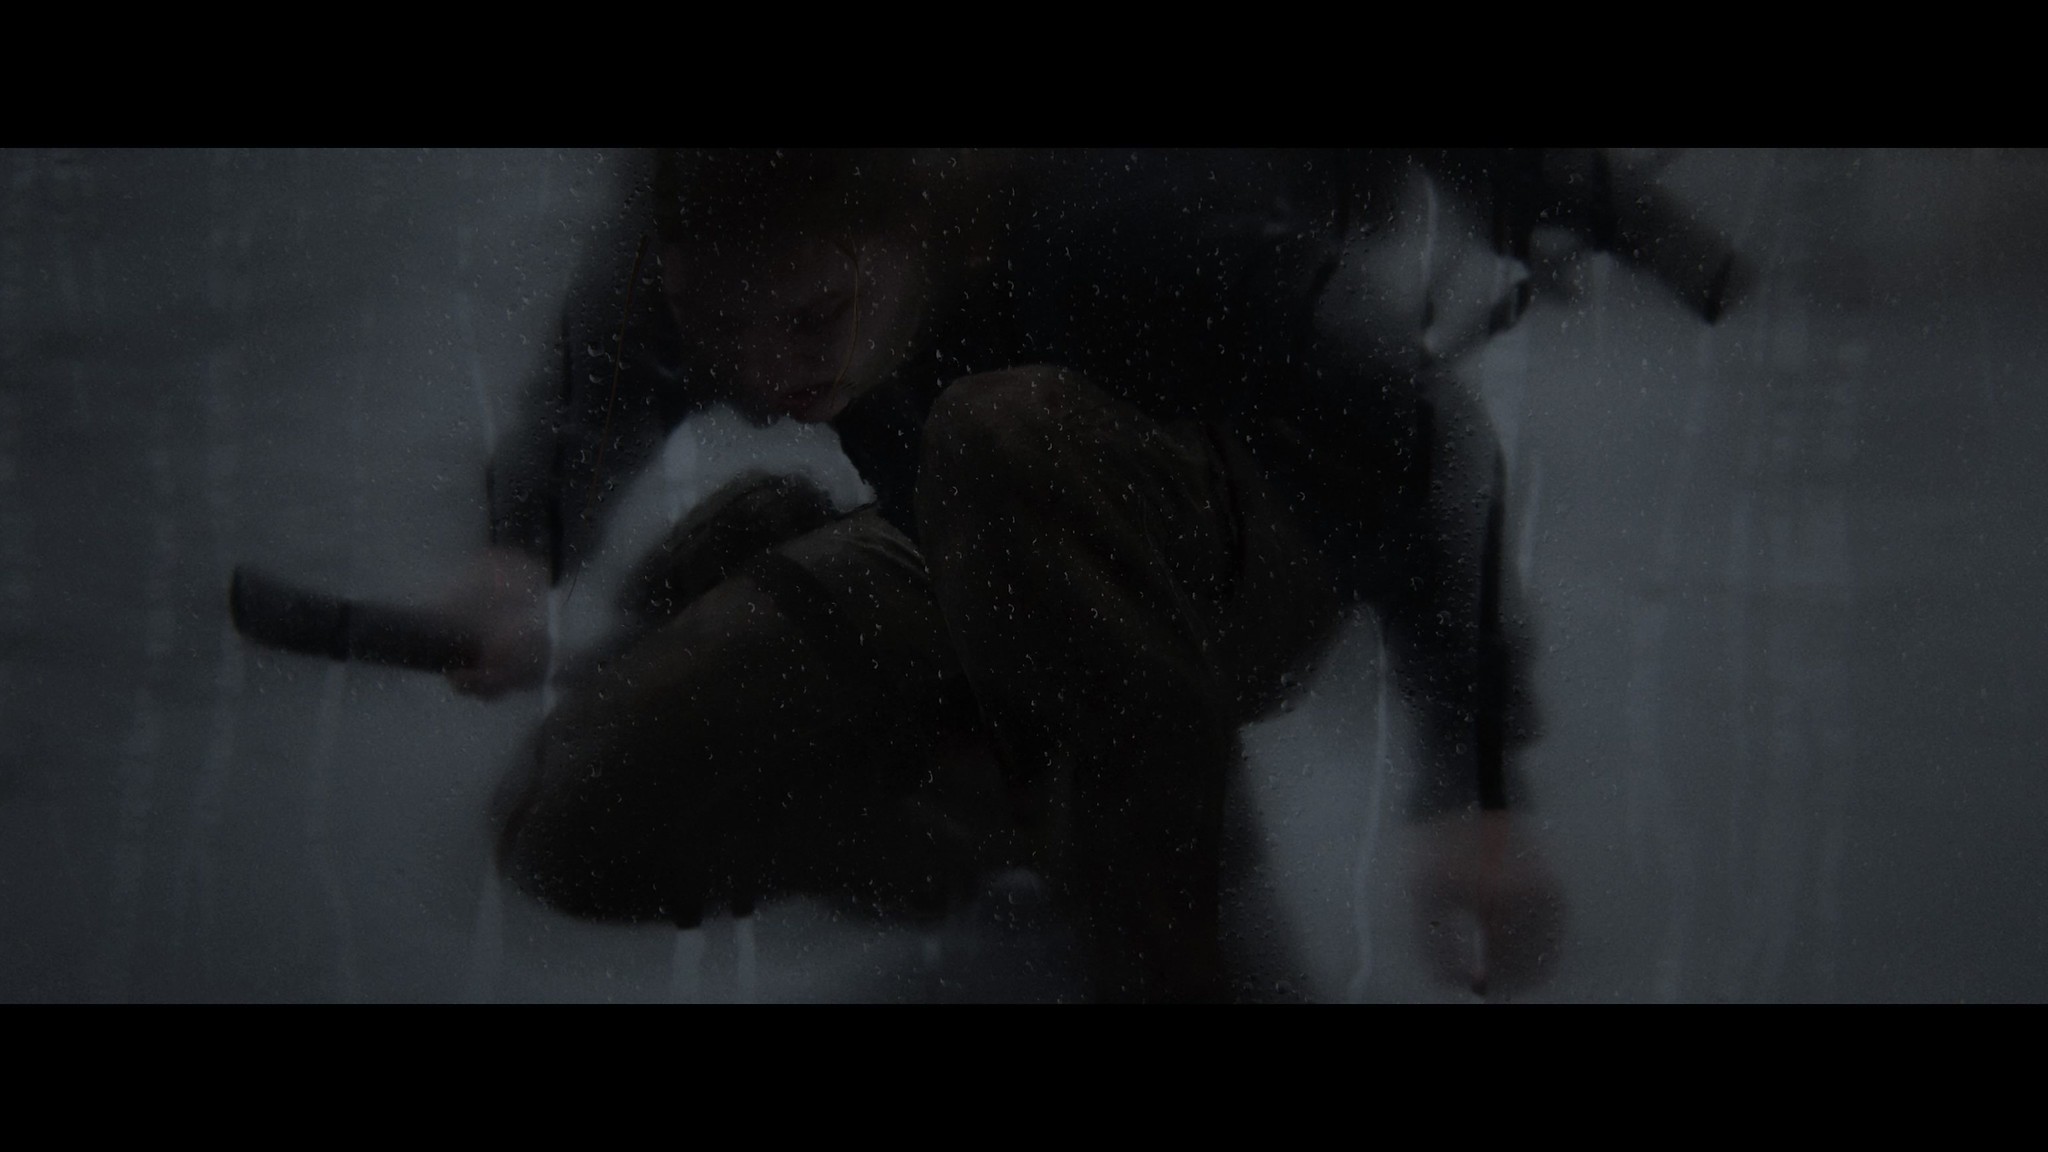
“I wanted an action picture this time and I knew this Seraphite fight in particular has a lot of interesting areas. It did take me a few tries to freeze-frame on something I was happy with. For the wetness effect, it’s possible to go prone and fully submerge underwater here. For Ellie to hold the axe this way, I believe I was dodging with L1. I blurred out the background with Depth of Field, turned Film Grain off completely, turned Saturation up, and also turned the sharpness up slightly so the detailing on the axe can be seen.”
*The contest is open to fans who are 18 years or older and legal residents of the United States (excluding Arizona) and Canada (excluding Quebec). Void in Puerto Rico, all U.S. territories and possessions and overseas military installations and where prohibited or restricted by law. For full T&Cs, visit naughtydog.com/TLOUDayContest.
**All screenshots in this article were captured on PS4 Pro.
Subscribe to our mailing list
Get the latest game reviews, news, features, and more straight to your inbox


